> For the complete documentation index, see [llms.txt](https://wiki.astrawireless.net/astra-wireless-documentation/llms.txt). Markdown versions of documentation pages are available by appending `.md` to page URLs; this page is available as [Markdown](https://wiki.astrawireless.net/astra-wireless-documentation/technical-documentation/next-monitoring-system-technical-user-manual/configuration-and-management/system-configuration.md).
# System configuration
## Network access
The network parameters are responsible for network access to the monitoring system. The initial values of the network parameters are determined at the monitoring system installing stage (NEXT installation).
The monitoring system allows only the one network adapter. Thus, the routing settings in the corporate network must be performed by the appropriate elements of the network infrastructure.
Network parameters are presented in the "**Network**" part of the "**Settings**" section:
* **Connection method** - a method for determining the network parameters values. Static - values are specified manually, DHCP - values are determined automatically using a DHCP server.
* **IP address** - the adapter network address.
* **Network mask** - the network mask.
* **Default gateway** - the default router IP address.
* **Main DNS Server** - the main DNS server IP address. To add additional addresses, click the "**Add reserve DNS server**" button.
Click the "**Save**" button to complete the configuration.
## Provisioning
There are parameters controls auto provisioning function:
* **Provisioning** - switch activates provisioning. Please note that configuration management is available only for provisioned devices.
* **Use Telnet for provisioning** - activates using Telnet protocol for devices provisioning, by default SSH is using.
* **Device access credentials** - to do provisioning **NEXT** will try to connect to devices via SSH/Telnet protocols using these credentials. If several credential pairs are specified, they will be used alternately until authentication is successful.
## Connection to the email server
Notifications will be sent to monitoring system users via the e-mail server specified in the configuration.
Go to the "Email" part of the "Settings" section. There are the following parameters are responsible for the monitoring system connection to a remote SMTP server:
* **Sender address** - an email address that will be set in the FROM field of emails sent to users by the monitoring system.
* **SMTP server address** - FQDN or IP address of the SMTP server.
* **SMTP server network port** - the network port used to connect to the SMTP server.
* **Use SSL** - this option must be enabled if the connection to the SMTP server is performed using the SSL protocol. In case the connection has no encryption or the TLS protocol is used, the parameter must be disabled - the monitoring system automatically determines the possibility of the TLS protocol using.
* **SMTP server login** - username for authentication on the SMTP server. Leave blank if no authentication is required.
* **SMTP server password** - password for authentication on the SMTP server. Leave blank if no authentication is required.
Click the "**Save**" button to complete the configuration.
### Connection Testing
To verify that your SMTP server connection is configured correctly, you can use the test email feature. Click the "**Send test email**" link. In the window that appears, enter the recipient's email address and click the "Send" button.
## SNMP credentials
Devices are added and subsequently polled using the SNMP protocol. The monitoring system utilizes a list of SNMP access credentials, which can be managed in the "Settings" section. Within the "SNMP" subsection, you must specify the access credentials configured on the wireless network devices.
The SNMP network port cannot be changed and is always set to 161/UDP.
## System Log collection
To enable or disable the built-in syslog server, use the "**Server Status in NEXT**" flag. When the server is enabled, the NEXT monitoring system collects and stores event messages from devices system logs.
To view a system log, go to the "**Events**" tab within the device profile; for more details, see the "Devices" article.

In the "**External Servers**" tab, you can specify the addresses of external primary and secondary syslog servers to which user actions system log will be sent.

## Maintenance
### Software Version Update
In the "System" section under the "Maintenance" tab, you can view information about the current version of the monitoring system and the time of the last update check. The system can be updated either online, if the monitoring system has internet access; or offline.
If you have internet access, click the "**Check the updates**" button to search for new software versions.
Online system update management offers the following configuration options:
* "**Automatic download and application of updates**" – defines the action to be taken when a new software version is detected. There are three available options:
* "**No action**" – no action is taken when a new version is detected.
* "**Download only**" – the new version is downloaded and prepared for installation, but the update is only applied after user confirmation.
* "**Download and installation**" – the new software version is downloaded and installed immediately upon detection or during the next scheduled "active period."
* "**Period of activity**" – allows you to define a specific time frame during which a new software version will be downloaded and installed if one is detected.
To perform a manual update, you must first download the update file to your PC. Update files are available for download on the "Changelog" page of this technical documentation.

### Backups
To prevent data loss in case of server failure, we recommend regularly creating backups of your monitoring system data. You can create or restore a backup either via the "**Maintenance**" tab or by using the Initial Setup Wizard when logging into the web interface of a new system for the first time.
When creating a backup, you can select the specific data to be saved and choose whether to encrypt the backup file. The backup process takes a few minutes. The resulting file can be saved to your local PC.

### Diagnostic tools
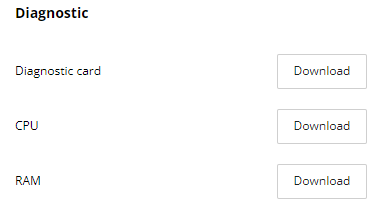
The monitoring system has the following diagnostic tools located in the corresponding section of the “Maintenance” tab:
* "**Diagnostic card**" is a text file containing information about the installed NEXT monitoring system, license and operating status of its subsystems. The file generation may take about 30 seconds.
* "**CPU**" - a set of files with information about CPU load by NEXT subsystems. The file generation may take about 30 seconds.
* "**RAM**" - a set of files with information about RAM load by NEXT subsystems. The file generation may take about 30 seconds.
These files must be generated and attached to the request when contacting technical support.
## Authentication
The monitoring system supports two user authentication modes:
* Local database - user accounts added by an administrator in the "Users" section of the web interface.
* RADIUS protocol - authentication via a third-party server (if this fails, the system attempts authentication using the local database).

For RADIUS-based authentication provide the access credentials for main and backup servers and select a user group to which new accounts will be added.

Upon the first login to the system via a RADIUS server, a user account will be created with the "Observer" role and an empty scope. An administrator must modify the role and scope in the "Users" section of the web interface.
Users who authenticate via RADIUS are identified by a special "External" marker in the user list and within their individual user profiles.

## Other
To automatically set links between two devices to "Monitoring" mode, enable the corresponding function under "Other" – "Link Management." Otherwise, any detected link will remain in a "Candidate" state until an administrator manually changes their status to "Monitoring." While in the "Candidate" state, these channels will not be monitored, and no status data will be collected or displayed in the device profile.

## Interaction with a Higher-Level System
When NEXT needs to interact with a higher-level Network Management System (NMS), a so-called Northbound Interface (NBI) is used. For more details on configuring the NBI subsystem, please refer to the article "NBI in NEXT."
To activate or deactivate the NBI subsystem, use the "Use NBI" flag (disabled by default).

Using the NBI requires authentication and authorization: NEXT allows for the creation of multiple NBI users, each with different access rights to specific objects and methods. To create a new user, click the "Add User" button.
For each user, access rights can be defined for the following objects: tasks, devices, links, metrics, incident rules, incidents, and software files. For these objects, one of three access levels can be assigned:
* "-" — no access rights;
* "read" — ability to view object parameters;
* "read + write" — ability to view and modify available parameters.
The NBI supports the following operations for objects within NEXT:
* devices and device groups:
* retrieving a list of device groups;
* creating/deleting a device group;
* retrieving a list of devices;
* deleting a device from the NEXT database.
* communication channels:
* retrieving a list of communication channels.
* incidents and incident rules:
* retrieving a list of incident rules;
* retrieving a list of incidents.
* jobs:
* creating tasks for adding devices, applying configurations, updating software, or applying licenses;
* retrieving a list of tasks;
* starting/canceling tasks.
* software files:
* retrieving a list of software files;
* deleting a software file.
NEXT includes built-in NBI documentation that describes the available commands and their parameters. The documentation is accessible at , where "next\_url" is the IP address or domain name of the NEXT instance.
## Licensing
In the "**Settings**" → "**Licensing**" section you may install new license or get details about the current one.
### License management
{% hint style="warning" %}
**NOTE**
In order to apply the license, the user's PC must have an access to the Internet. The NEXT server access to the Internet is not required.
{% endhint %}
Operation with licenses are performed in Astra Wireless Licensing Center, please click on the "**Go to CA**" button. You should use your AW Passport account to authorize in the licensing center. Please be careful because requested licenses will be issued to the organization and person specified in your user profile.
In the licensing center you can create **Free** and **Trial** licenses yourself, Free type licenses can be created in any number.
In order to add a previously purchased **Enterprise** license to the CL, contact the Astra Wireless technical support Service Desk, specifying following information:
* An account in AW Passport for which a Free type license was generated at the initial setup stage. Without generating a license of the Free type, activation of an Enterprise license is not possible.
* Company name.
* Number of devices.
After receiving a message from the technical support about the license activation, go to the **Licensing** section and perform the following steps:
1. Copy the activation key from the NEXT monitoring system.
2. Go to the personal account of the licensing center and select the desired license.
3. Paste the copied activation key into the appropriate field.
4. Click the button to generate a license key.
5. Copy the generated license key.
6. Return to the licensing settings of the NEXT system and paste the license key in the appropriate field.
7. Press the "Apply" button.
#### License Revocation
If you need to transfer an Enterprise or Trial license to another server running the monitoring system, or if you reinstall the NEXT system, you must revoke the license. To do this:
1. Go to your Licensing Center account.
2. Next to the desired license, click "Revoke" button (Free licenses cannot be revoked).
3. Activate the license on the new server using the way described above.